Grooves
Grooves is Drum Buddha's library and its core practice screen at once — every pattern you'll ever read, play, loop, or build starts here.
In the other Buddha apps, the library tab holds songs. Drums don't have songs in the same sense — they have patterns, and Grooves is where all of them live: 197 built-in grooves across 17 styles, plus anything you build yourself. But Grooves isn't just a list you browse and tap away from. The notation, the transport, the practice tools, the recording flow — it's all here, on the groove itself. This is the page you'll spend the most time on.
Browsing the library
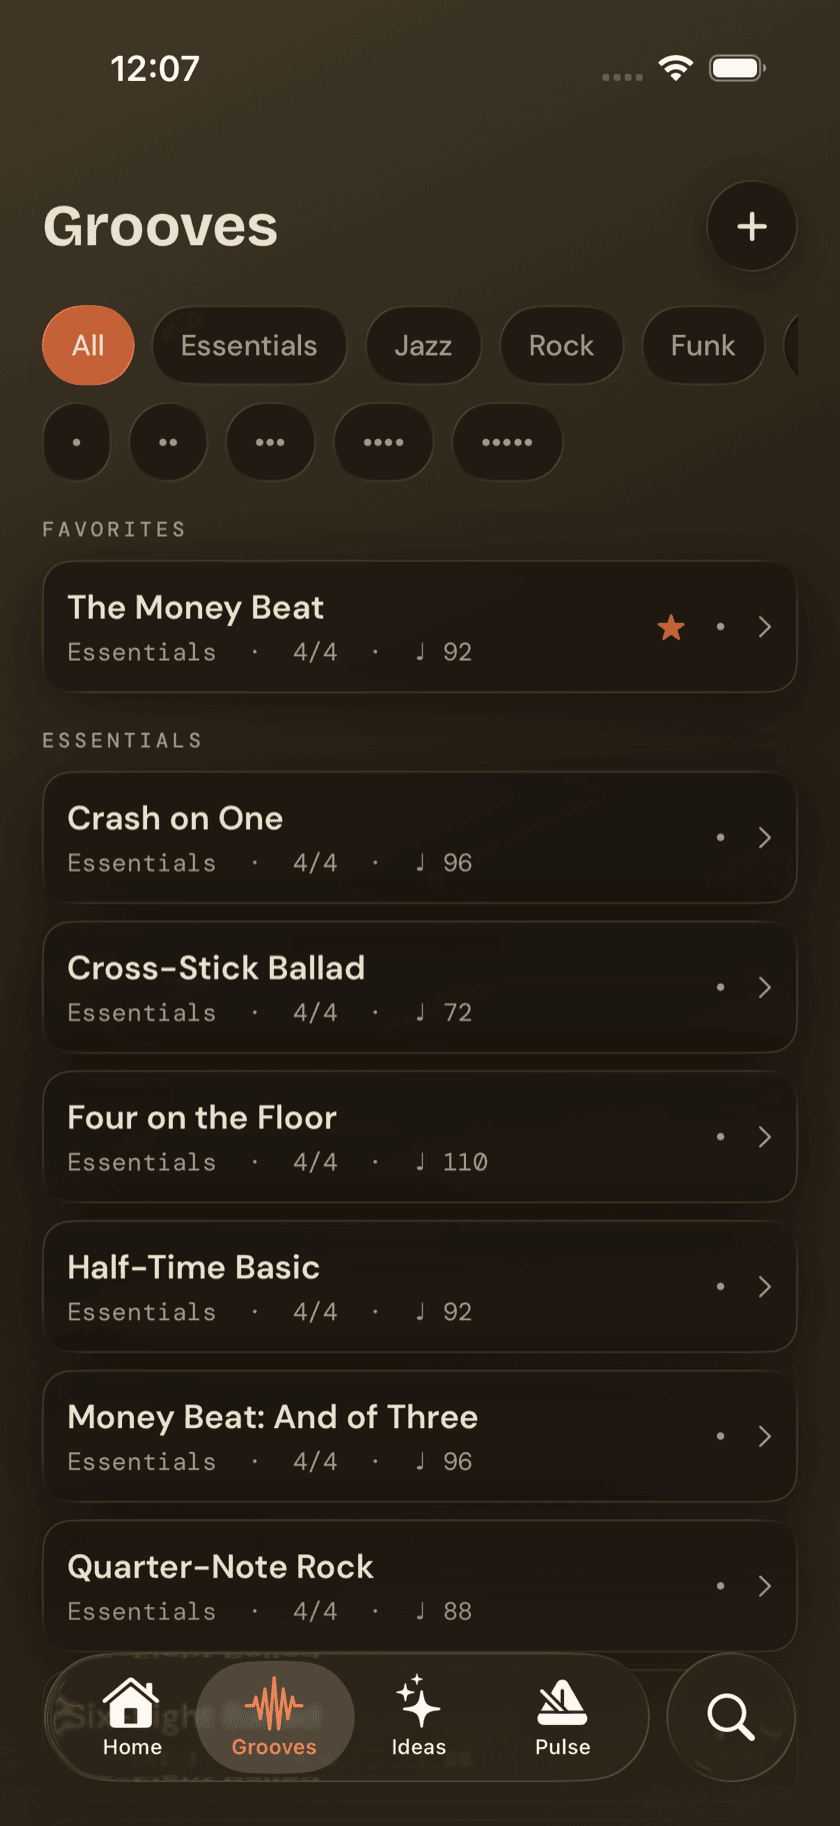
The Grooves tab opens on a title, "Grooves," and a + button in the corner (its accessibility label is "Create a groove") that jumps straight to the groove editor.
Under that, a row of style pills — All, plus the 17 styles in the catalog: Essentials, Jazz, Rock, Funk, World, Pop, Blues, R&B, Country, Soul, Punk, Metal, Hip-Hop, Disco, Latin, Afro-Cuban, Reggae — and a row of difficulty pills, shown as dots from • (easiest) to ••••• (hardest) instead of numbers.
Below the filters, the list breaks into sections, in this order:
- Favorites — anything you've starred, if you've starred anything.
- Your Grooves — patterns you've built or duplicated, sorted by most recently updated.
- One section per style — Essentials first, always, then the rest.
Each groove is a card: the name, a mono subtitle, a filled star if you've favorited it, difficulty dots, and a chevron. Catalog grooves show something like Essentials · 4/4 · ♩ 92 — style, time signature, default tempo. Your own grooves show Rock · 4/4 · yours instead — no tempo in the subtitle, and no difficulty dots either, since those only apply to catalog patterns.
Filter down to nothing and the app doesn't just leave you staring at empty space: Nothing here yet. No grooves match that filter. Loosen it up, or make your own.
Favoriting works the same way everywhere in the app. Star a groove from its detail page or straight off the card, and it shows up under Favorites at the top of the library, on top of whatever style section it already belongs to.
Opening a groove
Tap a card and you land on that groove's detail page: the name at the top, and a star you can toggle right there to favorite or unfavorite it without going back to the list.
Everything below the header is built around one groove — how to read it, how to play it back, how to practice it, and how to record yourself playing it.
Reading the pattern: notation and grid
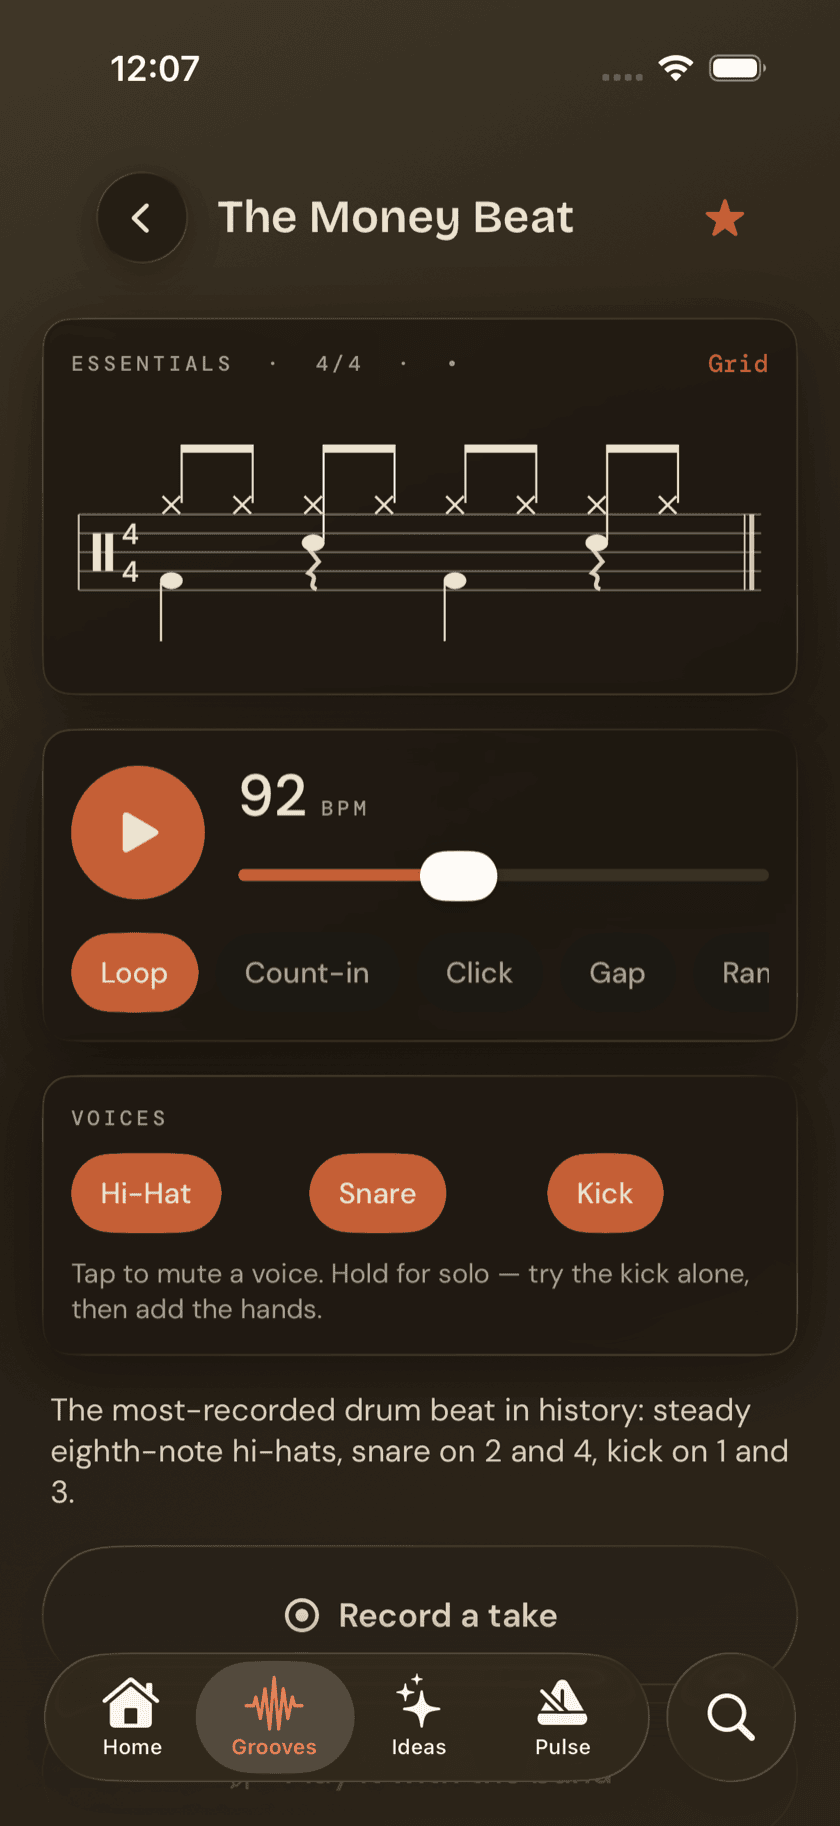
The notation card is the centerpiece of the detail page, and it can show you the same groove two ways. A toggle button flips between them.
Standard notation is a real five-line percussion staff — not a stylized approximation. Noteheads follow standard conventions: filled ellipses for most drums, an "x" for hi-hats, ride, and crash, a diamond for the ride bell. Beaming, ties, and accent wedges are all drawn correctly. Ghost notes appear in parentheses. Rudiment-based patterns get sticking letters, R and L, right on the staff. While the groove plays, a playhead moves across the notation in real time, tracking exactly where you are.
Grid view trades the staff for something more like a sequencer: voices run down the rows, subdivisions run across the columns, and each hit is a dot. The dot's size and whether it's filled or just a ring tells you the velocity — ghost, normal, or accent — at a glance.
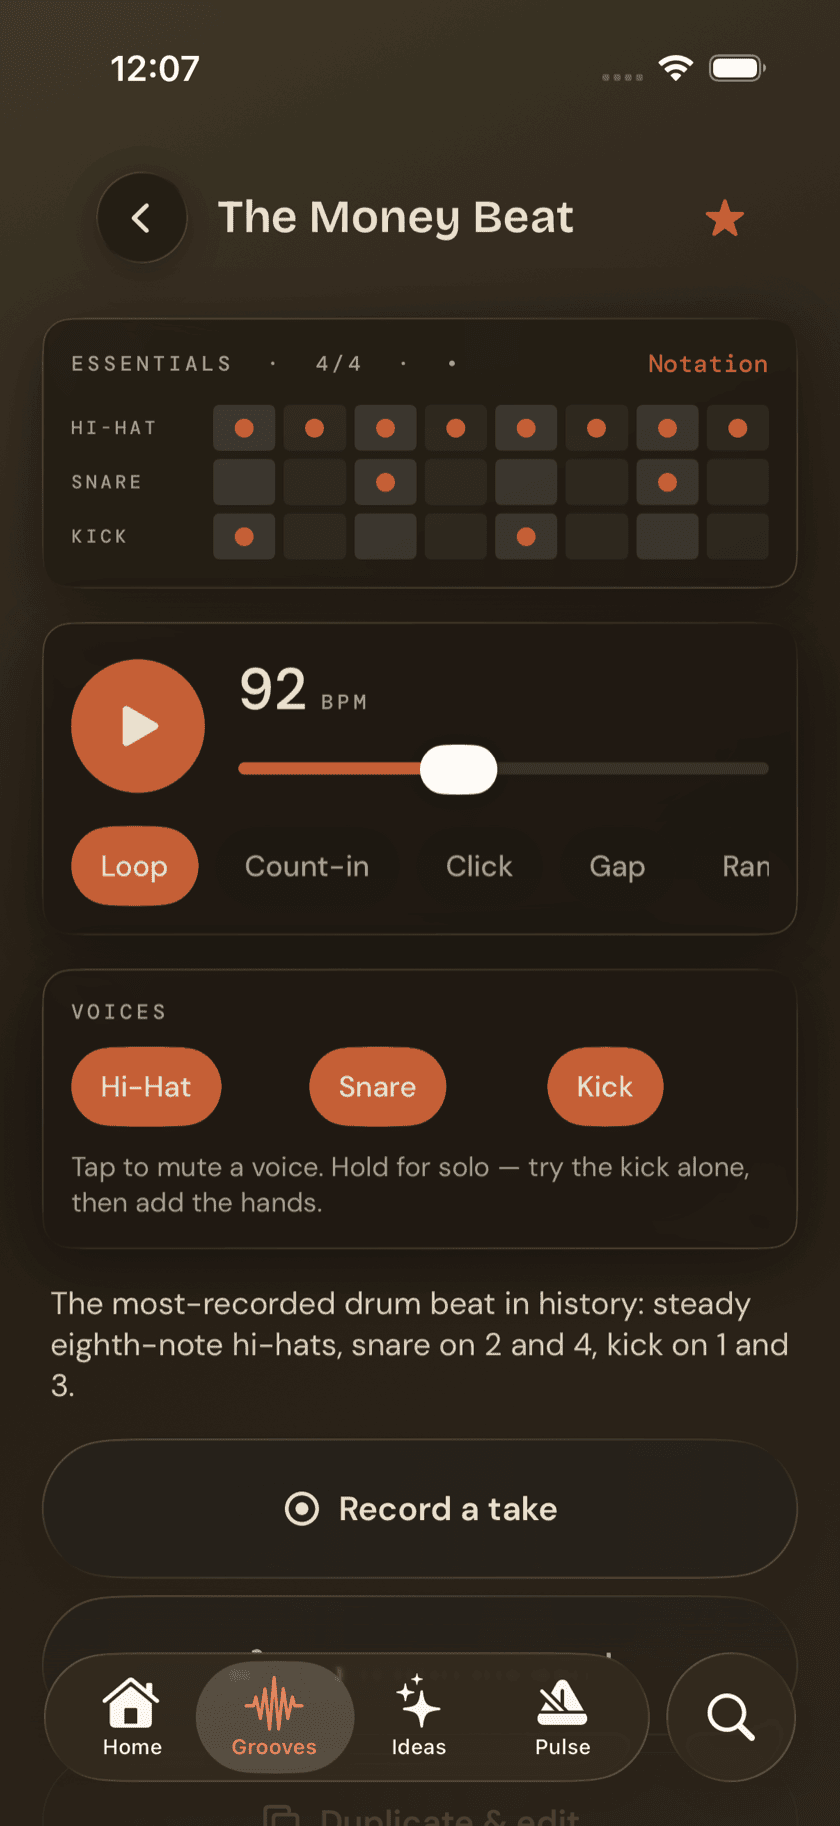
Which one you reach for probably depends on what you're doing: standard notation if you're working on reading, grid view if you just want to see the pattern's shape fast.
Playing it back
Below the notation, a transport card handles playback. Play/stop is the obvious one. Next to it, a big BPM readout — tap it or drag the tempo slider and a Reset button appears next to it, so getting back to the groove's default tempo is one tap, not a slider hunt.
A row of pills rounds out the transport card: Loop, Count-in, Click, Gap, Ramp, and a drum-kit choice for the sound you're playing back with.
Practicing at the edges: Gap and Ramp
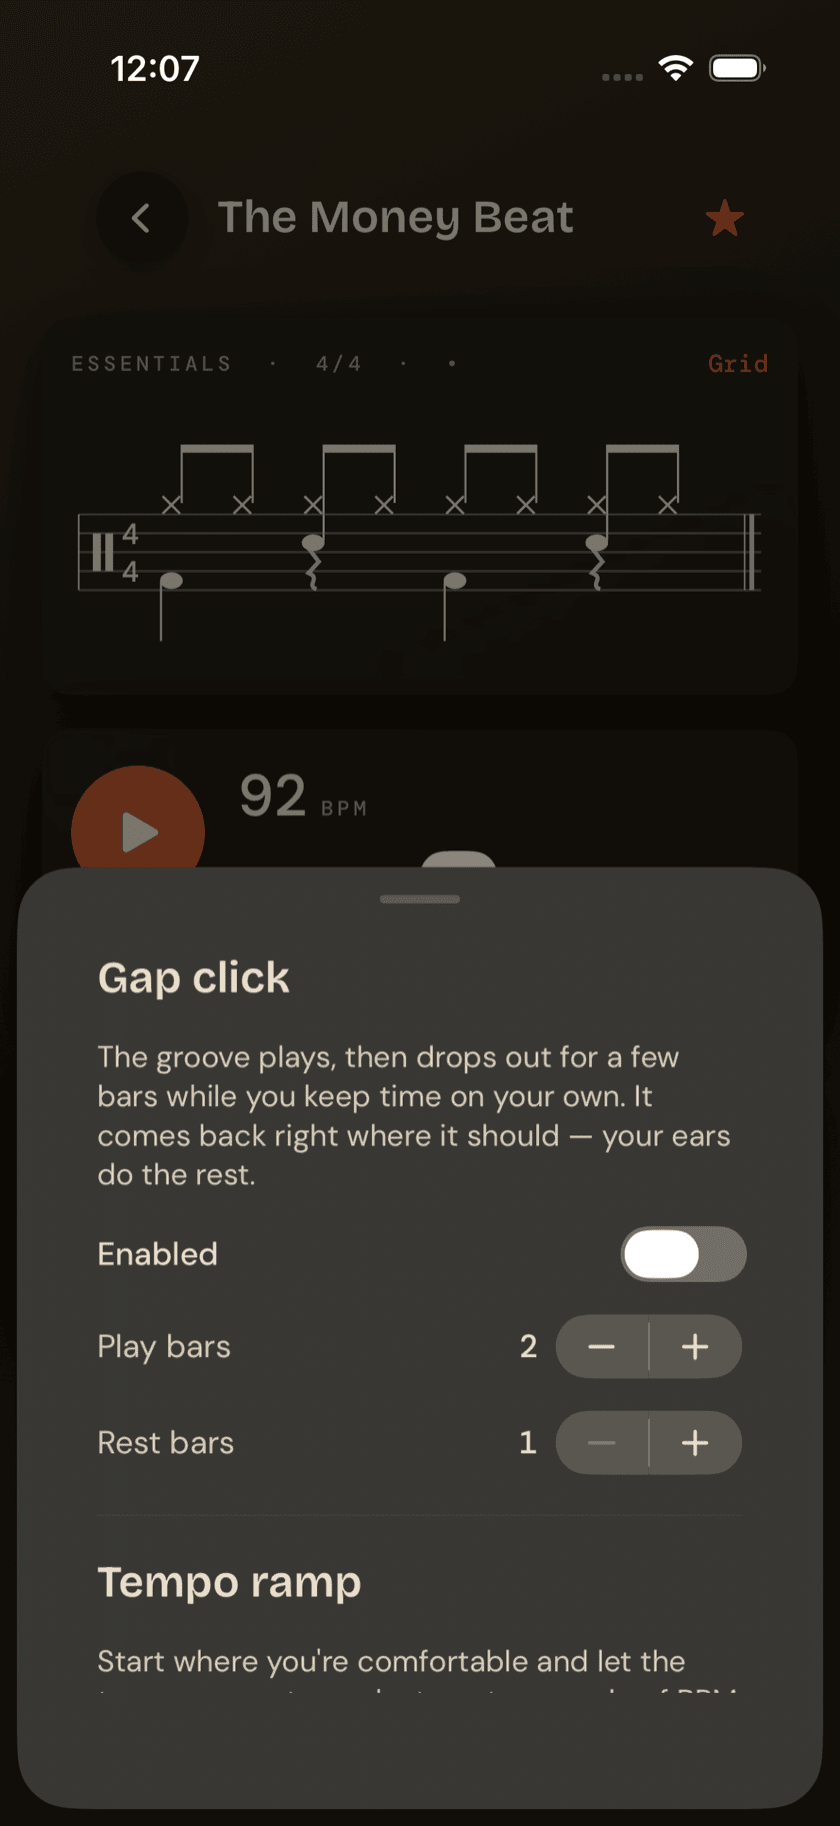
Two of those pills, Gap and Ramp, aren't simple toggles — tap either one and a practice sheet opens underneath.
The groove plays, then drops out for a few bars while you keep time on your own. It comes back right where it should — your ears do the rest.
Gap click gives you two steppers: Play-bars and Rest-bars, each from 1 to 4. Set how long the groove plays before it goes quiet, and how long it stays quiet before it comes back.
Start where you're comfortable and let the tempo creep toward a target, a couple of BPM at a time. The step always lands on a barline.
Tempo ramp gives you three steppers instead: Target BPM (40–220), BPM-per-step (1–8), and Bars-per-step (1–8) — how far to climb, how big each jump is, and how many bars you get at each tempo before the next jump.
Muting and soloing voices
Under the transport card, a voices card lists every active voice in the pattern — whatever drums the groove actually uses. Tap one to mute it. Long-press to solo it, muting everything else. The card spells it out plainly: Tap to mute a voice. Hold for solo — try the kick alone, then add the hands.
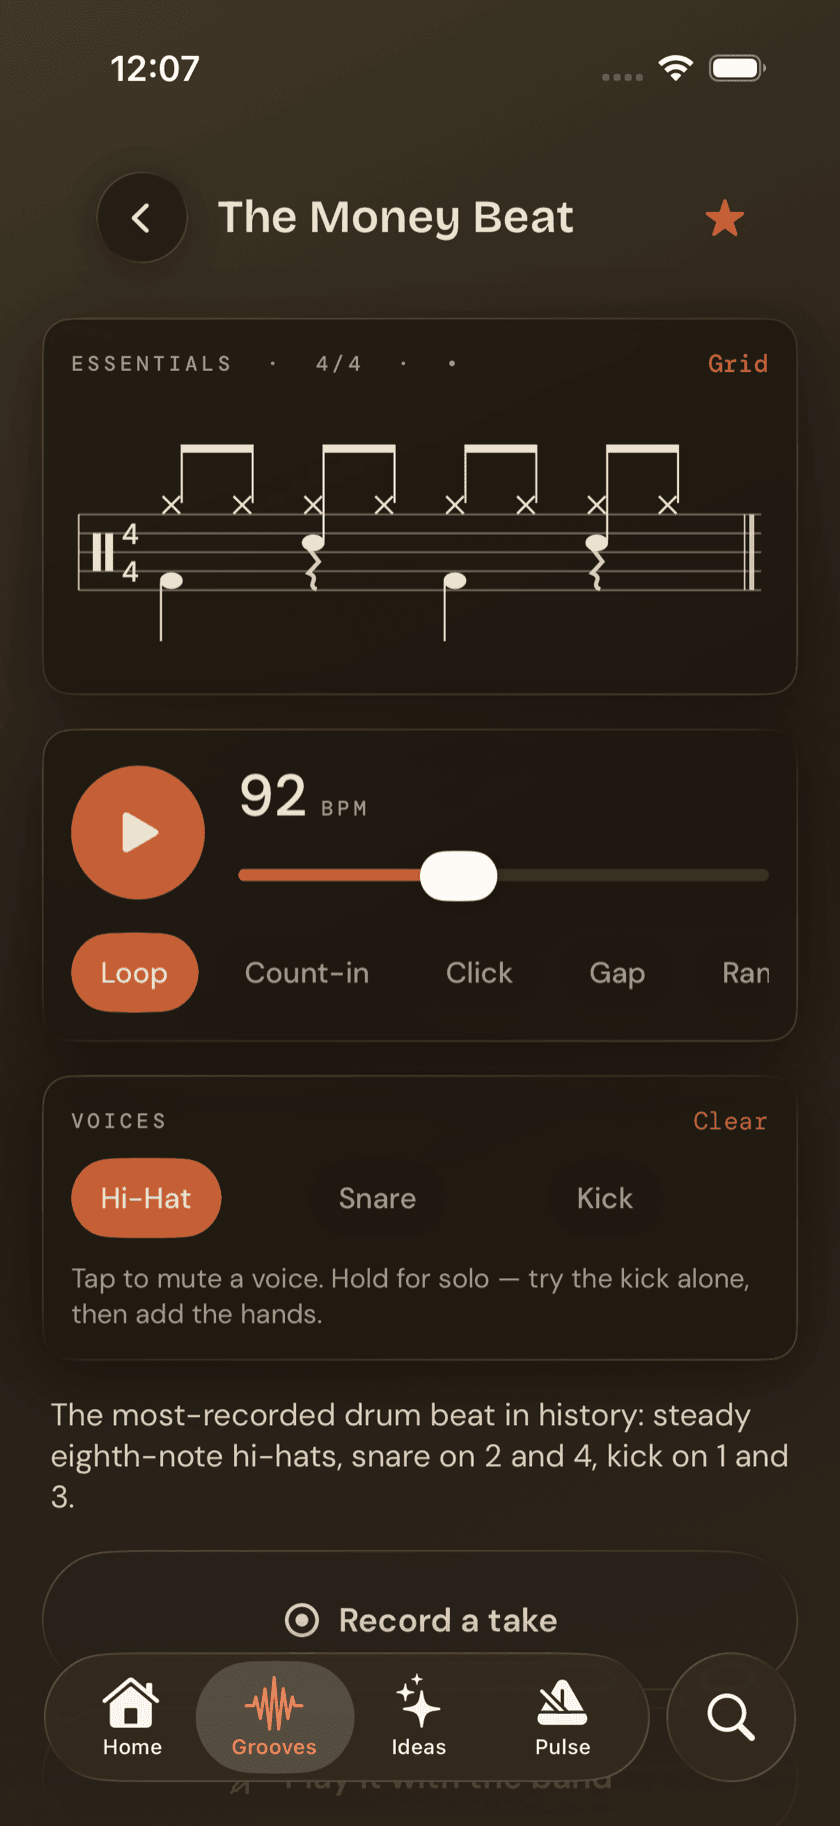
It's a fast way to isolate one limb at a time without leaving the groove or building anything special — mute the hands and work on your kick foot alone, then bring the rest back in.
Recording a take
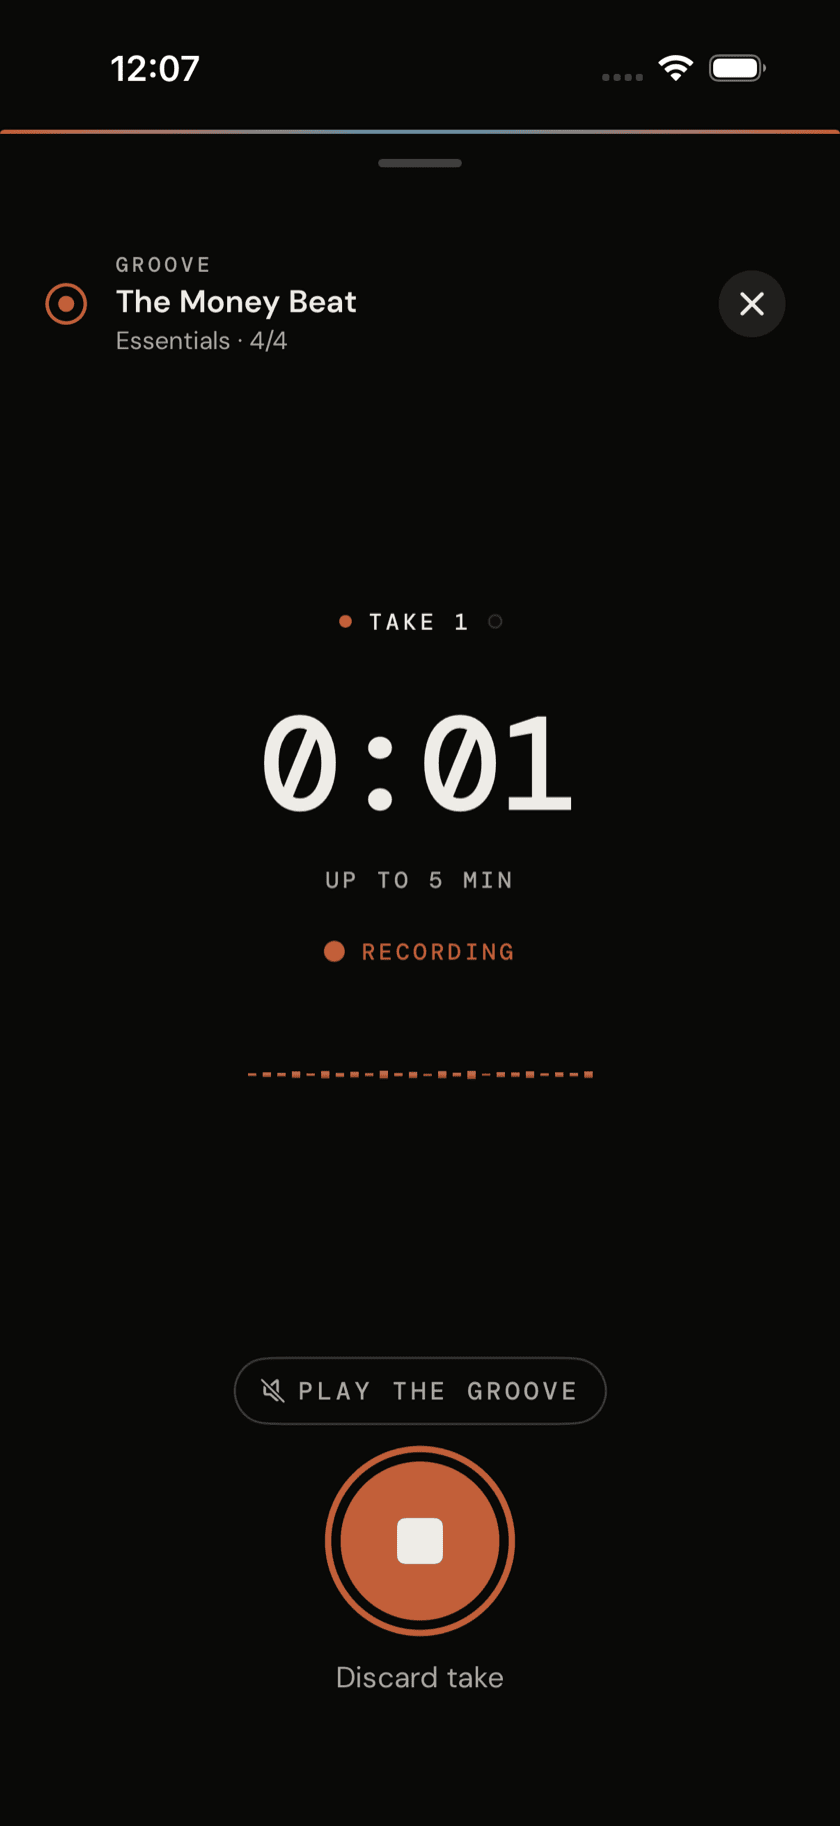
"Record a take" starts a count-in, then records. There's a "Play the groove" pill in the recording flow too, so you can record yourself playing along with the groove's own click instead of against silence.
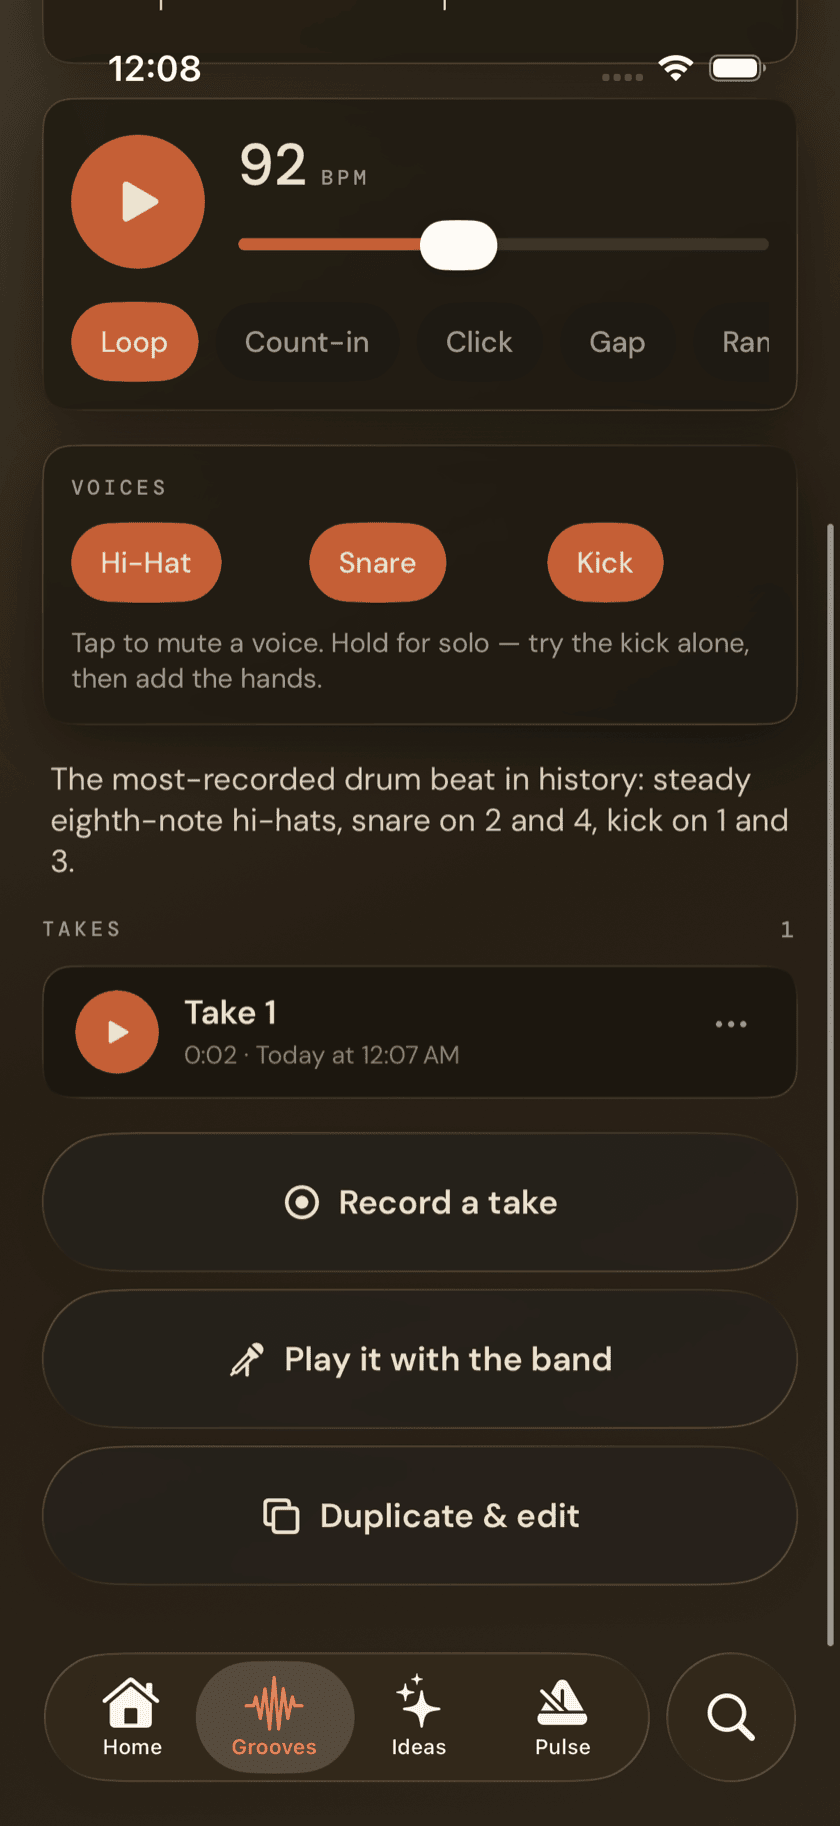
Once you've got takes, the two most relevant ones — best and newest — preview right on the detail page, with a "View all takes (N)" button if there are more. Each take, individually, can be:
- Marked as best
- Favorited
- Trimmed
- Renamed
- Duplicated
- Shared
- Deleted
Other actions
Two more buttons live on the detail page. "Play it with the band" opens Jam, already matched to this groove's style and tempo — no setup, no picking a backing track, it just starts.
The last action depends on where the groove came from. Your own grooves get "Edit groove" and "Delete groove," straight up. Catalog grooves get "Duplicate & edit" instead.
Catalog grooves can't be edited or deleted directly. Tap Duplicate & edit and you get your own copy, dropped into Your Grooves, free to change however you like — the original catalog version stays exactly where it was.
Building your own groove
The + button on the library, or "Duplicate & edit" on a catalog groove, both open the same place: a step-sequencer-style groove editor. The header reads New Groove or Edit Groove depending on which door you came in, with Cancel on one side and Save on the other.
A meta card at the top handles the basics: a name field, a style menu (12 options), time signature (4/4, 3/4, 6/8, 12/8, 5/4, or 7/8), a subdivision setting, bar count, Straight or Swung pills, and a default-tempo slider.
Below that, the grid card — this is the actual pattern-building surface. Its eyebrow spells out exactly how it works: TAP · HIT → ACCENT → GHOST → REST. Each row is a voice — Crash, Ride, Ride Bell, Open Hat, Hi-Hat, High Tom, Mid Tom, Snare, Cross-Stick, Floor Tom, Kick, and Foot Hat — and each column is a step. Tap an empty cell and it becomes a hit. Tap again for an accent, again for a ghost note, and once more clears it back to rest. The cycle just keeps looping.
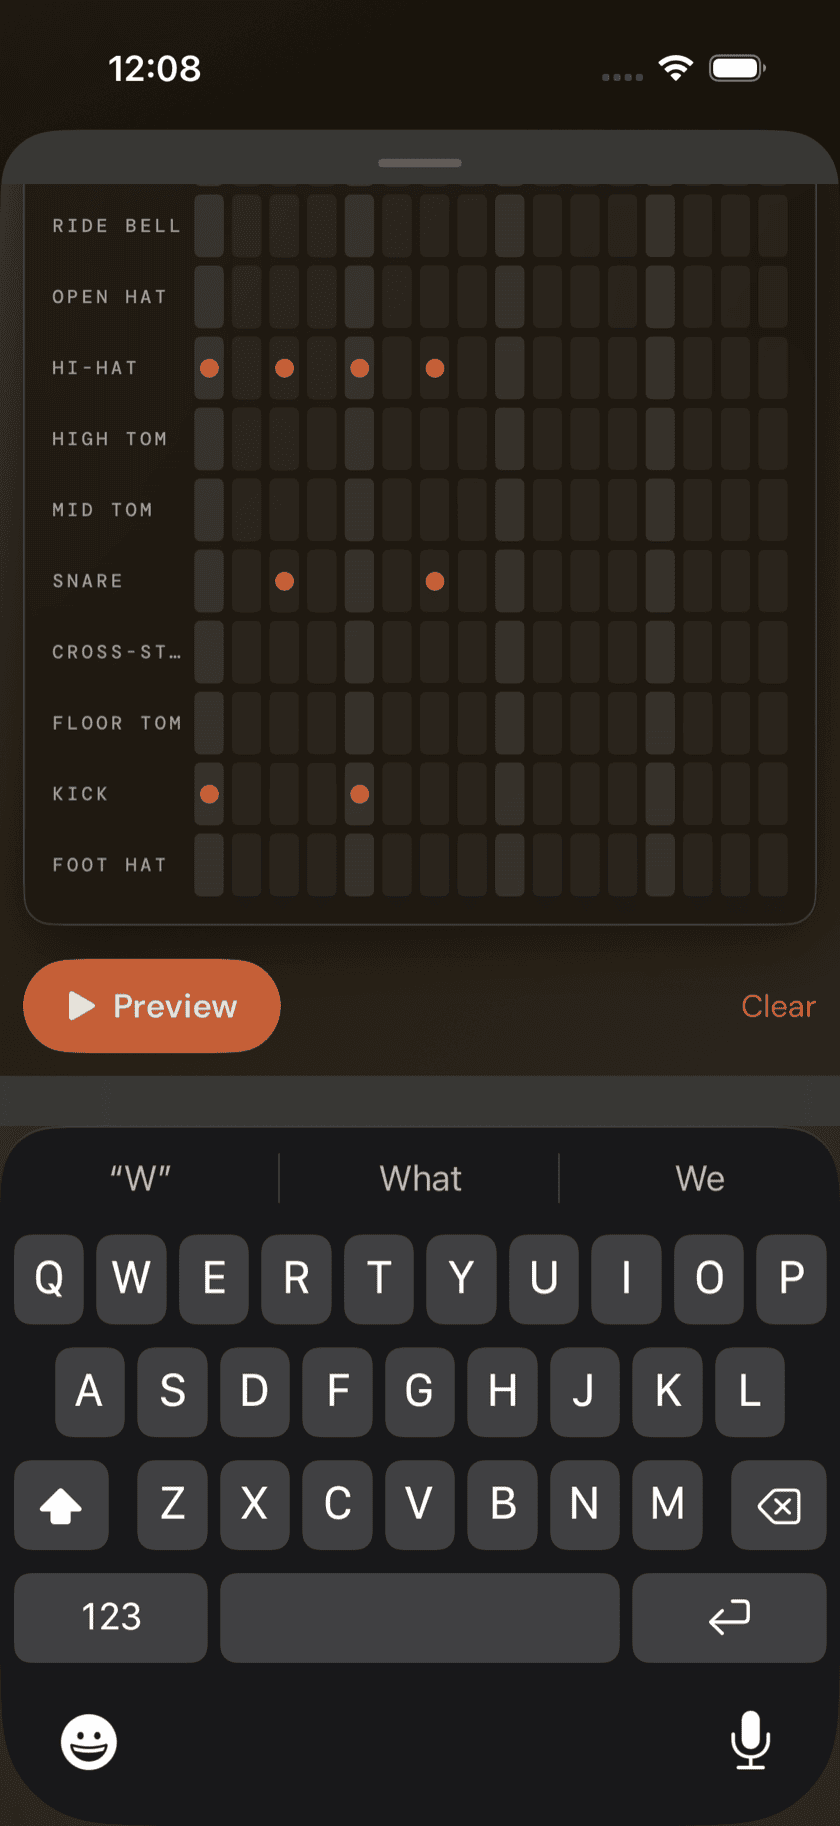
A Preview button plays your pattern back as you build it (it becomes Stop while it's playing), and a Clear button wipes the grid if you want to start the pattern over without leaving the editor.
Sit down and play.
Learn grooves, capture ideas, jam with a live band, and keep time — free, local-first, on iOS & iPadOS.
Explore Drum Buddha →